

The first step :Flash
We recommend that you use the armbian system image https://github.com/hzyitc/armbian-onecloud/releases
Once completed, log in to the ssh of the onething box
Execute cp /usr/share/zoneinfo/Asia/Shanghai /etc/localtime to correct the time (please modify it as appropriate)
Execute nano /etc/apt/sources.list
(Not required for non-mainland Chinese users) Delete all content and replace with:
https://mirrors.tuna.tsinghua.edu.cn/debian/ bullseye main contrib non-free

# deb-src https://mirrors.tuna.tsinghua.edu.cn/debian/ bullseye main contrib non-free

deb https://mirrors.tuna.tsinghua.edu.cn/debian/ bullseye-updates main contrib non-free

# deb-src https://mirrors.tuna.tsinghua.edu.cn/debian/ bullseye-updates main contrib non-free

deb https://mirrors.tuna.tsinghua.edu.cn/debian/ bullseye-backports main contrib non-free

# deb-src https://mirrors.tuna.tsinghua.edu.cn/debian/ bullseye-backports main contrib non-free

deb https://mirrors.tuna.tsinghua.edu.cn/debian-security bullseye-security main contrib non-free

# deb-src https://mirrors.tuna.tsinghua.edu.cn/debian-security bullseye-security main contrib non-free
Ctrl + X and press Y to enter to save
The second step is to install dependencies
First execute apt update
Install docker
curl -fsSL get.docker.com | sh
The third step is to download os-gent and install it
https://github.com/home-assistant/os-agent/releases
dpkg -i *downloaded file name*
You may then see a prompt
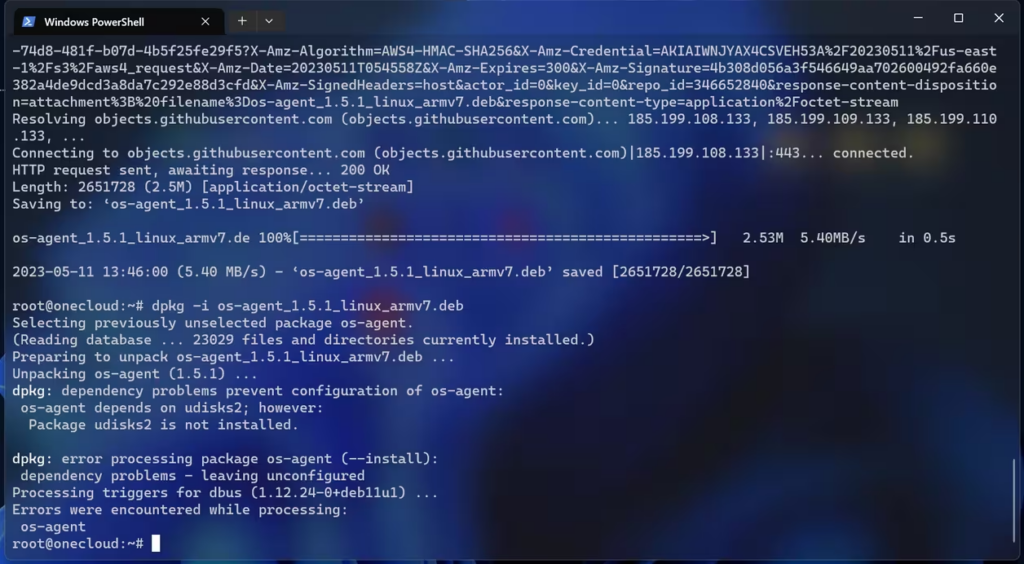


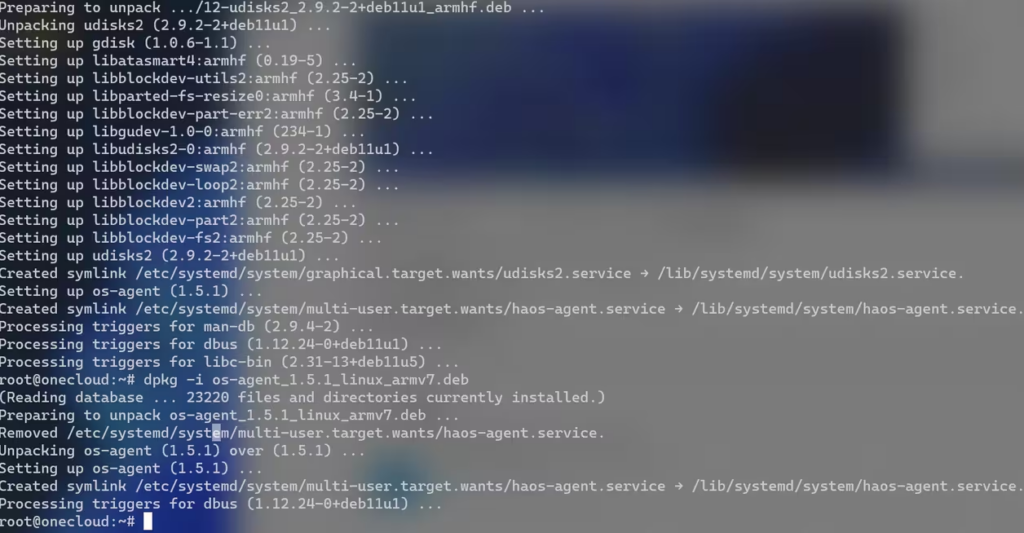
Don’t panic, execute apt –fix-broken install and then press y and press Enter
At this time, execute dpkg -i again *downloaded file name*
You will find that it is installed
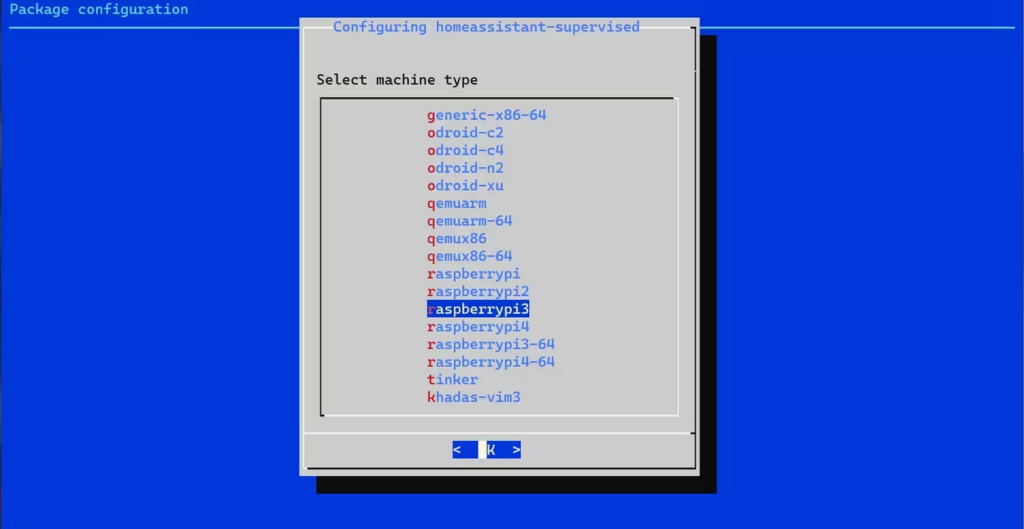
Step 4 Install Home Assistant Supervised Debian Package
Run sudo apt-get install apparmor
wget https://github.com/home-assistant/supervised-installer/releases/latest/download/homeassistant-supervised.deb
dpkg -i homeassistant-supervised.deb
An error will be reported at this time

Press Y after executing apt –fix-broken install
Select raspberrypi3 and press Enter
When the picture below appears, the installation is successful.
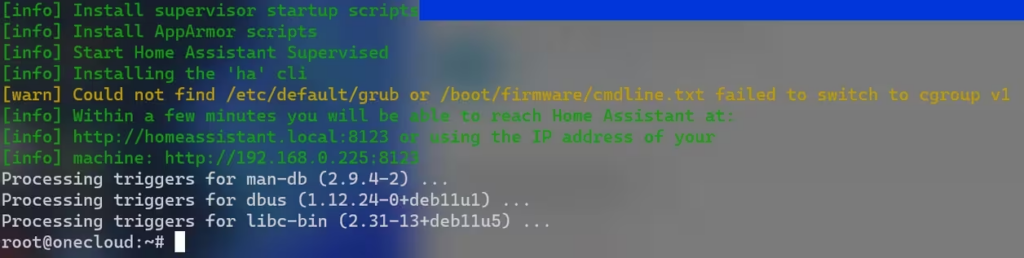
If it does not appear, execute dpkg -i homeassistant-supervised.deb again, select raspberrypi3 and press Enter
After completion, continue executing the following instructions
cd /usr/share/hassio
nano jobs.json
input this
{"ignore_conditions": ["healthy"]}Press Ctrl + X and then press Y to enter to save and exit.
Step 5 Install HACS
Execute in sequence
mkdir /usr/share/hassio/homeassistant/custom_components

mkdir /usr/share/hassio/homeassistant/custom_components/www

mkdir /usr/share/hassio/homeassistant/custom_components/hacs

cd /usr/share/hassio/homeassistant/custom_components/hacs

wget https://github.com/hacs/integration/releases/latest/download/hacs.zip

apt install unzip

unzip hacs.zip

rm hacs.zip
After a while, visit http://onething_box_ip:8123 and you will see the picture below.

Step 6 End
Do not cut off power or network at this time. Wait patiently. You can use docker ps to check the installation progress.
If the Internet speed is fast, you can enter http://onething_box_ip:8123 for configuration in half an hour.
Remark
(If there is a prompt about missing dependencies during installation, execute apt –fix-broken install and then re-execute the installation instructions)
Leave a Reply